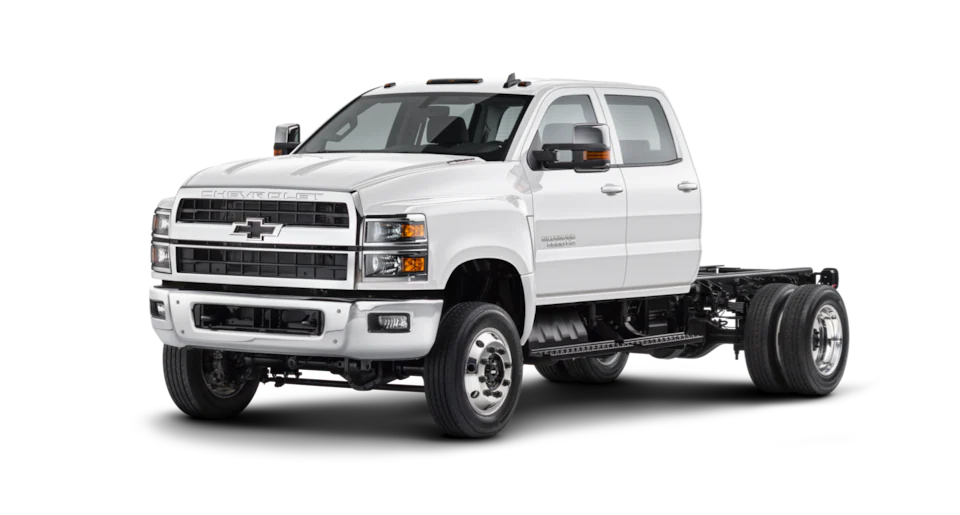
April 13, 2023 NHTSA CAMPAIGN NUMBER: 23V266000
Brake Pressure Switch May Short and Cause Fire
An electrical short in the brake pressure switch can overheat the circuit and increase the risk of a fire while driving or parked.
NHTSA Campaign Number: 23V266
Manufacturer General Motors , LLC
, LLC
Components SERVICE BRAKES, HYDRAULIC
Potential Number of Units Affected 40,428
Summary
General Motors. LLC (GM) is recalling certain 2019-2023 Chevrolet 4500HD, 5500HD, and 6500HD Medium-Duty trucks. The brake pressure sensor assembly may leak brake fluid into the brake pressure switch and cause an electrical short-circuit.
Remedy
Owners are advised to park outside and away from structures until the recall repair is complete. Dealers will replace the master cylinder pressure sensor and inspect the wire harness, replacing it, if necessary, free of charge. Owner notification letters were mailed July 11, 2023. Owners may contact Chevrolet customer service at 1-800-222-1020. GM’s number for this recall is N222375270.
Notes
Owners may also contact the National Highway Traffic Safety Administration Vehicle Safety Hotline at 1-888-327-4236 (TTY 1-800-424-9153), or go to www.nhtsa.gov.
Check if your Vehicle has a Recall
Safety Recall
N222375270 Brake Pressure Switch Connector Fire
Condition
General Motors has decided that a defect which relates to motor vehicle safety may exist in certain 2019-2023 model year Chevrolet Silverado Medium Duty 4500HD/5500HD/6500HD vehicles. These vehicles may have a brake pressure sensor assembly that allows brake fluid to leak beyond the diaphragm seal into the pressure switch. The brake fluid may seep into the sensor’s electrical components and short the brake pressure switch and the associated fuse. If brake fluid shorts the brake pressure switch and the associated fuse, the circuit can generate excessive heat that could result in a fire, increasing the risk of injury. An underhood fire may occur when the vehicle is off and possibly unattended.
Correction
Dealers will replace the master cylinder pressure sensor. Dealers will also inspect the associated wire harness and replace if necessary.
Parts
| Quantity | Part Name | Part No. | |
| 1 | Brake Pressure Wiring Switch | 19409480 | |
| 1 | Wire Harness* | 19407615 | |
| 1 | Wire Harness* | 19408341 | |
| 1 | Battery Terminal Nut* | 19405196 | |
| As Required | DOT 3 Motor Vehicle Brake Fluid | +NPN | |
| As Required | Blue Dielectric Grease** | +NPN | |
| As Required | 14-inch cable tie strap | +NPN |
** NANO2133005 or equivalent locally sourced.
+ Locally sourced non-GM material.
Service Procedure
1. Park vehicle on a flat surface.
2. Shift transmission to Park or Neutral and set the Parking Brake.
3. Turn vehicle to Key OFF position.
4. Install wheel chocks.
5. Unlatch and open the hood.
Note: Vehicles built on or before 11/30/2020 will have the Brake Pressure Switch located in position (1). Vehicles built on or after 12/01/2020 will have the Brake Pressure Switch located in position (2).
6. Locate the Brake Pressure Switch (1) or (2) depending on build date.
7. Locate the Brake Booster Pressure Switch Connector (1), shown above.
8. Disconnect the Harness Connector (2) from the Brake Pressure Switch (1).
Note: Some vehicles may have dielectric grease in the switch/connector, this should not be confused with brake fluid.
9. Inspect for presence of brake fluid at both the Brake Pressure Switch Terminals (1) and Harness Connector (2).
• If there is NO brake fluid in the switch terminals or harness connector, proceed to step 10.
• If there is brake fluid present in the switch terminals or harness connector, proceed to step 13.
10. Locate both 5-amp fuses (2) and remove the protective cover (1).
11. Remove the fuses (2).
12. Inspect for presence of brake fluid in both fuse connections (3).
• If brake fluid is NOT present in the fuse connectors, reinstall fuses and protective covers. Proceed to step 13.
• If brake fluid is present in either fuse connectors, it is NOT necessary to reinstall fuses and protective covers, proceed to step 13.
Caution: Ensure NO brake fluid gets into the connector end of the NEW Brake Pressure Switch. If brake fluid gets into the connector end, the NEW Brake Pressure Switch MUST be replaced.
Note: Before proceeding to the next step, you MUST have new switch in your hand.
Note: Verify that the brake fluid level is above the “ADD” line on the master cylinder.
13. Pour a few drops of NEW DOT 3 brake fluid into the NEW Brake Pressure Switch.
Caution: To prevent damage to property, utilize a back-up style wrench to prevent brake line damage. Failure to do so can result in damage to the brake line.
Caution: To prevent damage to property, ensure brake pressure switch connector is shielded from fluids, debris, and other contaminants. Failure to do so can result in damage to property.
14. Remove the existing Brake Pressure Switch and quickly install the NEW Brake Pressure Switch, tighten to 48 Nm (35 lb ft).
• If brake fluid was present in steps 9 and/or 12, proceed to step 15.
• If brake fluid was NOT present in steps 9 and/or 12, proceed to step 39.
Note: The Battery Terminal Nut is not listed as a single use component in SI, however for this procedure it is to be DISCARDED.
15. Disconnect the Negative Battery Cable and DISCARD the Battery Terminal Nut. Refer to Battery Negative Cable Disconnection and Connection in SI.
16. Disconnect the Back-up Booster Pump Motor Jumper Wire Harness Connector (1) from the Center Chassis Harness
Connector (2).
17. Cut and discard the Cable Tie Strap (4) connecting the Diode (5) to the Relay Mounting Bracket (2).
18. Disconnect the Relay Connector (6).
19. If the vehicle being worked on was built on or before 11/30/2020, perform step 19A. If the vehicle being worked on
was built on or after 12/01/2020, perform step 19B.
A. Disconnect the Master Cylinder Fluid Level Sensor mounted on the Brake Fluid Reservoir, Low-Pressure Brake
Switch Connector mounted on the Master Cylinder, and the Brake Booster Flow Switch mounted on the Hydromax
Booster.
B. Disconnect the Master Cylinder Fluid Level Sensor mounted on the Brake Fluid Reservoir and Brake Booster
Flow Switch mounted on the Hydromax Booster.
20. Remove the Bolt (1) securing the Ground Wire (2) to the Hydromax Brake Booster (3).
21. Reposition the Ground Wire (2).
22. Remove the Nut and Lock Washer (2) securing the Power Wire (1) to the Booster Pump Motor Terminal (3).
23. Reposition the Wire (1).
Note: The wire harness routing varies based upon build date. Vehicles built on or before 11/30/2020 are shown on the left (1). Vehicles built on or after 12/01/2020 are shown on the right (2).
24. Record the Wire Harness routing and the location of Cable Tie Straps and Clipping Saddles.
25. Cut and discard Cable Tie Straps securing the Wire Harness.
26. Remove and DISCARD the Wire Harness.
Caution: To prevent damage to property, use caution while routing harness. Failure to do so can lead to damage to harness.
27. Using previously recorded routing and slipping locations, route new harness as noted in step 24, installing cable tie straps where previously located.
28. Position the Ring Terminal of the Power Wire (1) over the Booster Pump Motor Terminal (3).
29. Install and tighten the lock washer and nut (2) to 2 Nm (17 lb in).
Caution: To prevent damage to property, ensure even application of dielectric grease to backup pump power terminal nut and booster pump ground bolt. Failure to do so can result in damage to property.
30. Evenly apply dielectric grease to the top of the Backup Pump Power Terminal Nut (2).
31. Evenly apply dielectric grease to both sides of the Ground Ring Terminal Eyelet on the Ground Wire (2).
32. Position the Ground Bolt (1) through the Ring Terminal Eyelet of the Ground Wire (2) and into the Hydromax Brake Booster (3).
33. Tighten to Ground Bolt (1) to 11.5 Nm (102 lb in).
34. If the vehicle being worked on was built on or before 11/30/2020, perform step 34A. If the vehicle being worked on was built on or after 12/01/2020, perform step 34B.
A. Connect the Master Cylinder Fluid Level Sensor mounted on the Brake Fluid Reservoir, Low-Pressure Brake Switch Connector mounted on the Master Cylinder, and the Brake Booster Flow Switch mounted on the Hydromax Booster.
B. Connect the Master Cylinder Fluid Level Sensor mounted on the Brake Fluid Reservoir and the Brake Booster Flow Switch mounted on the Hydromax Booster.
35. Connect the relay connector (6).
36. Connect the Booster Pumper Motor Jumper Harness Connector (1) to the Center Chassis Harness Connector (2).
37. Use a cable tie strap to secure the Diode (5) to the Relay Mounting Bracket (2).
38. Using a cable tie strap, secure both fuse holders to the Brake Jumper Harness.
39. Route and connect the Hydraulic Brake Pressure Switch (2) to the Hydraulic Brake Pressure Switch Harness Connector (1).
Caution: To prevent damage to property, ensure brake fluid does not contact painted surfaces. Failure to do so can result in damage to property.
Note: Verify brake fluid level is filled to the “MAX” level with NEW DOT 3 brake fluid before performing brake bleeding procedure.
40. Bleed the FRONT brakes. Refer to Hydraulic Brake System Bleeding in SI.
41. Using a cable tie strap (3) secure the Brake Booster Flow Switch Harness (2).
• If the battery was disconnected, proceed to step 42.
• If the battery was NOT disconnected, proceed to step 45.
42. Using a wire brush, electronic contact cleaner, and compressed shop air, clean the negative battery terminal components.
43. Apply BLUE dielectric grease to the Battery Terminal Stud, Negative Battery Cable Ring Terminal, and threads of the NEW Battery Stud Nut.
44. Connect the Battery Negative Cable. Refer to Battery Negative Cable Disconnection and Connection in SI.
45. Turn the ignition switch to key ON, engine OFF position.
46. Depress the brake pedal to verify Backup Booster Pump Motor Operation.
47. Turn the ignition switch to key OFF position.
48. Close and latch the hood.
49. Remove the wheel chocks.
Chronology :
On August 9, 2022, GM opened a product investigation following a claim of a vehicle fire on a 2019 Chevrolet Silverado Medium Duty vehicle. As part of that investigation, GM coordinated with Navistar, the manufacturer of the subject vehicles, to review field data and warranty returned brake pressure sensors.
While a series of tests failed to duplicate the SUFS vehicle’s condition, on January 25, 2023, a warranty returned sensor and harness was identified which exhibited signs of heat damage. This part was subjected to more detailed analysis, including X-ray scans which were completed on February 13, 2023, followed by chemistry laboratory analysis which was completed on February 28, 2023. The results from these analyses revealed the presence of brake fluid past the diaphragm seal, into the brake pressure switch and through the actual wire harness into the pump’s fuse circuit. Analysis of the returned components also revealed delamination of the corrosion inhibiting sealant, which allowed slow seepage of the brake fluid past the diaphragm seal.
On March 30, 2023, Navistar reported one potentially related field incident involving a part with alleged heat damage. On April 5, 2023, Navistar provided GM a list of potentially affected vehicle VINs.
On April 6, 2023, GM’s Safety Field Action Decision Authority (SFADA) decided to conduct a safety recall. GM’s final analysis of the field data, including legal claims, identified a total of twenty-one potentially related complaints, eleven of which alleged a fire, smoke, or flame. GM was provided notice of those events between July 26, 2021, and January 25, 2023.
GM is not aware of any accidents or injuries associated with this condition.
15 Affected Products
Vehicles
16 Associated Documents
Manufacturer Notices(to Dealers,etc – Dealer Message re Stop Delivery Order for Safety Recall N222375270 Brake Pressure Switch Connector Fire
Defect Notice 573 Report
RCLRPT-23V266-6802.PDF 214.884KB
Recall Acknowledgement
RCAK-23V266-3257.pdf 645.466KB
Recall 573 Report – 4/14/23
RCLRPT-23V266-8748.PDF 214.882KB
Miscellaneous Document – Frequently Asked Questions (FAQs) for Safety Recall N222375270 Brake Pressure Switch Connector Fire
RMISC-23V266-2918.pdf 104.916KB
Manufacturer Notices(to Dealers,etc) – Dealer Message re N222375270 – Safety Recall Brake Pressure Switch Connector Fire Application for Used Vehicle Working Capital Assistance Program (WCAP)
RCMN-23V266-8086.pdf 109.791KB
ISSUED Interim Owner Notification Letter(Part 577)
RIONL-23V266-8494.pdf 97.253KB
Recall 573 Report – 5/17/23
RCLRPT-23V266-5467.PDF 214.87KB
Recall 573 Report – 5/17/23
RCLRPT-23V266-4879.PDF 214.87KB
Remedy Instructions and TSB
RCRIT-23V266-9179.pdf 821.533KB
Miscellaneous Document – Frequently Asked Questions (FAQs) for Safety Recall N222375270 Brake Pressure Switch Connector Fire
RMISC-23V266-2810.pdf 104.803KB
Manufacturer Notices(to Dealers,etc) – Dealer Message re N222375270 – Safety Recall Brake Pressure Switch Connector Fire
RCMN-23V266-1404.pdf 180.734KB
ISSUED Owner Notification Letter(Part 577)
RCONL-23V266-5715.pdf 83.028KB
Recall Quarterly Report #1, 2023-3
RCLQRT-23V266-2177.PDF 211.29KB
Recall Quarterly Report #2, 2023-4
RCLQRT-23V266-6670.PDF 211.395KB
Recall Quarterly Report #3, 2024-1
RCLQRT-23V266-7115.PDF 211.478KB
Latest Recalls Documents

- [Wide Compatibility Heavy Duty Truck Scanner] Compatible with a wide range of 12V & 24V heavy-duty trucks across North America, including major truck brands such as Freightliner, Peterbilt, Kenworth, International, Volvo, and Western Star, with support for common diesel engines from Cummins, Detroit, and PACCAR. Whether you're an owner-operator, fleet manager, or repair technician, HD601 helps simplify routine inspections, preventive maintenance, and everyday fault checks. Vehicle coverage may vary by model year, system, and configuration
- [Full-System Diagnostic Truck Scanner] This heavy duty diagnostic scanner supports full-system diagnostics for heavy-duty trucks, including Engine, Transmission, ABS, and more.It helps quickly identify faults, pinpoint problem areas, troubleshoot faster, and understand which systems need attention before repairs. Compatible light-duty vehicles support OBD2 diagnostics only
- [DTC Library + Live Data] This truck diagnostic scanner's built-in DTC library helps truck drivers, DIY users, and more quickly understand fault information. You can also manually enter standard SPN and FMI codes to look up fault details. For roadside situations without internet access, it helps identify possible problem areas
- [2-in-1 Heavy Duty & OBDII Diagnostics] This heavy duty scanner supports both HDOBD and OBDII diagnostics. It provides essential functions including Quick Scan, Full Scan, Live Data, Freeze Frame Data, Fault Code Reading and Clearing, and more. It supports HDOBD protocols such as J1939 and J1587/J1708 for reliable vehicle communication
- [Supports Multiple Vehicle Types] Suitable for various commercial vehicles, including heavy-duty trucks, semi-trucks, buses, and more. This truck scanner diagnostic tool features 6/9/16-pin connectors to support common vehicle interfaces, making it suitable for different vehicle applications and transportation needs
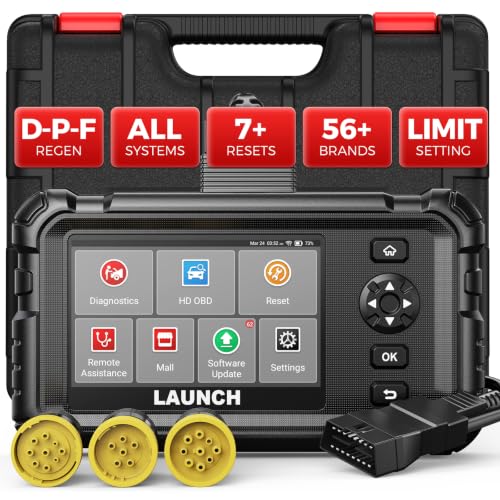
- Boost DPF Performance For Smooth Truck Operation: Facing power loss, weak acceleration or constant DPF warning lights? The DPF regen scan tool offers forced DPF regeneration, DPF Reset, and DPD/DPR functions to clear soot buildup, recover engine output and keep exhaust aftertreatment working properly. Detect DPF‑related errors fast, reduce downtime, and prolong your diesel particulate filter lifespan. Vehicle compatibility varies. Please verify before purchase.
- Full-System Diagnostics with Real-Time Live Data: This truck scanner diagnostic tool covers Engine, ABS, Transmission, SRS, SAS, TPMS and other core vehicle systems. Read & clear fault codes, access live data stream, freeze frame, I/M readiness, DTC lookup and additional practical functions. Leverage real‑time data to quickly locate faults and support reliable repair judgements.
- 7+ Resets ‑ Perform Essential Service Procedures: The heavy duty diagnostic tool comes with 7+ professional service resets. It supports DPF Regen for soot removal, Oil Reset to erase service reminders, Injector Coding for new injectors, DEF Test, Speed Limit Adjustment, Cylinder Cutout for weak cylinder detection, Clutch Relearn for improved clutch engagement. Run these resets after service or component replacement to keep your truck working properly. Available functions vary by vehicle model.
- One Professional heavy duty scanner for 50+ Truck Brands: Compatible with J1939, J1708, J1587, and OBD2/CAN protocols this semi truck scanner delivers wide coverage for mainstream diesel trucks and commercial vehicles. Supported brands include Cummins, Detroit, Caterpillar, Paccar, Volvo, Freightliner, Kenworth, Peterbilt, International, Mack, Isuzu, Hino, Scania, Mercedes-Benz, and more. This single diesel diagnostic scanner lets you service more vehicles and cut down tool investment costs.
- Expert Remote Diagnostic Support: Faced with unexpected truck breakdowns? Equipped with built‑in TeamViewer and tech‑to‑tech support, this diesel truck scanner enables secure real‑time remote connection with professional technicians for diagnosis and troubleshooting. Share live vehicle data and send diagnostic feedback for quicker technical analysis to get expert guidance, no on‑site service required. Minimize downtime, prevent unnecessary repairs and get your truck back on the road sooner.
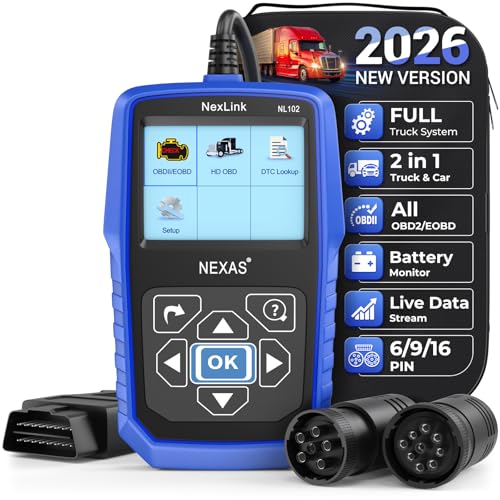
- Diagnose Heavy-Duty Truck Problems Fast — Read and clear fault codes and diagnose warning light issues on many Class 4–8 diesel trucks including Freightliner, Peterbilt, Kenworth, Volvo, Mack and Cummins-powered vehicles
- Help Reduce Downtime & Repair Costs — It offers full system diagnostics for major trucks meeting standard protocols, along with complete OBD2 functionality. Quickly check engine faults, view live truck data and identify issues before expensive repair shop visits or unnecessary repairs
- No complicated setup required — Simple menus and built-in DTC explanations make this truck code reader easy to use for owner-operators, mobile mechanics and small fleet maintenance
- Live Data & Built-in DTC Lookup — View real-time engine data and built-in truck fault code definitions directly on the scanner to help understand vehicle problems faster without searching through manuals
- Free Lifetime Updates & Technical Support — Includes free software updates plus responsive technical support for setup, compatibility and everyday truck diagnostics

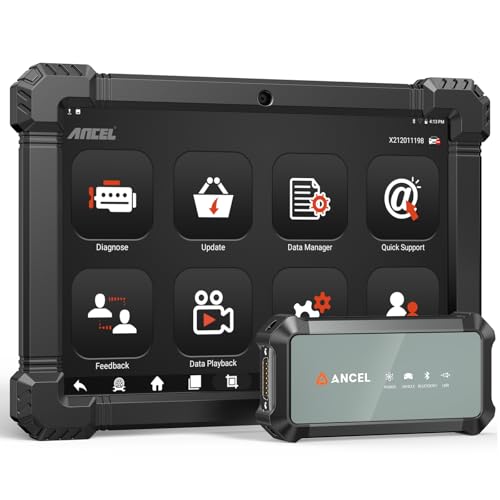
- HANDLE MORE HEAVY-DUTY JOBS WITH ONE SCANNER — The ANCEL X7HD PRO brings full-system diagnostics, HDOBD/OBD2 diagnostics, 42+ service functions, bi-directional controls, and ECU coding into one heavy-duty scan tool. Built for diesel technicians, repair shops, and fleet maintenance teams that need one scanner for everyday diagnostics, service, active tests, and post-repair work
- TAKE ON 42+ SERVICE & RESET JOBS IN-HOUSE — Perform supported DPF regeneration, injector coding, oil reset, throttle adaptation, EPB reset, ABS bleeding, idle/speed adjustment, and more. Handle more routine maintenance and service work in your own shop or fleet yard instead of relying on a dealer or separate tools for every job
- COMMAND COMPONENTS & CHECK THEIR RESPONSE — Bi-directional control lets you command supported components such as injectors, cooling fans, throttle actuators, and ABS-related systems, then check how they respond. Use active tests to narrow down a problem before tearing things apart or replacing parts, helping you troubleshoot based on actual component behavior instead of fault codes alone
- CODE & MATCH MODULES AFTER REPLACEMENT — Perform supported ECU coding, module matching, adaptations, and relearn procedures when replacing compatible components or control modules. Complete more post-repair setup with the same scanner and help ensure replacement modules are properly configured to communicate with the vehicle
- DIAGNOSE MORE SYSTEMS ACROSS A MIXED FLEET — Read and clear codes, view live data and freeze frame information, and access supported systems including Engine, Transmission, ABS, and Body. Coverage includes compatible Freightliner, Kenworth, Peterbilt, Volvo, Mack, and International trucks; Cummins, Caterpillar, Detroit, PACCAR, and Navistar engines; plus supported OBD2/HDOBD vehicles—giving multi-brand shops and fleets broader coverage from one tool
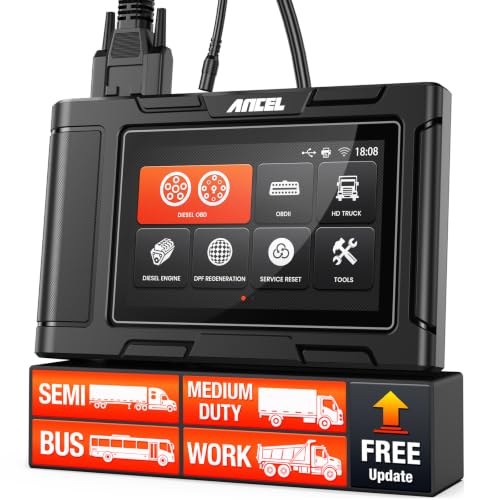
- Built for Heavy-Duty Trucks in Commercial Service: Go beyond basic passenger-car code reading with a heavy duty truck scanner built for real diesel truck service. Helps owner-operators, fleets, repair shops, used-truck businesses, and logistics teams handle everyday truck maintenance, prepare for DPF service, and troubleshoot with more confidence
- Get Back on the Road Faster with DPF Regen & Reset: Help perform DPF forced regeneration and DPF reset on supported Cummins, PACCAR, Caterpillar, Detroit, HD Volvo, Mack, International, and MaxxForce applications. Built-in CAN3 channel access helps complete regen and basic diagnostics without an extra CAN-3 adapter, so you can address soot-related issues sooner and reduce aftertreatment downtime
- Wide Coverage for Daily Service Needs: Works with Diesel OBD and OBD2 systems across Freightliner, Peterbilt, Kenworth, HD Volvo, Mack, International, Western Star, and more. Read vehicle information, clear fault codes, view live data, and perform oil reset on supported Isuzu, Fuso, and Hino applications—helping fleets and shops complete routine checks faster with fewer workflow delays
- Smarter Tools for Faster, More Reliable Repairs: Topology display, wiring diagrams, Pin Detect, and Pre/Post scan reports help technicians visualize system relationships, locate wiring or connector issues, document faults before service, and verify repairs after service. Clear reports help reduce guesswork, avoid rework, and support customer, fleet, and insurance claim documentation
- Free Software Updates, No Annual Fees: Get free software updates for the life of the device, which may help you save hundreds of dollars compared with subscription-based scanners. One-click software updates help keep your scanner current without extra annual fees, giving fleets, repair shops, and owner-operators better long-term value
SEOCONTENT-START
Frequently Asked Questions (FAQs) for Safety Recall N222375270
Brake Pressure Switch Connector Fire
These questions and answers are being provided to help GM dealers respond to inquiries from involved vehicle owners about the Safety Recall identified above.
Q1) Which vehicles are involved?
A1) Certain 2019 – 2023 model year Chevrolet Silverado Medium Duty 4500HD/5500HD/6500HD vehicles
Q2) What is the issue or condition?
A2) These vehicles may have a brake pressure sensor assembly that allows brake fluid to leak beyond the diaphragm seal into the pressure switch. The brake fluid may seep into the sensor’s electrical components and short the brake pressure switch and the associated fuse.
Q3) What symptoms may be experienced? What warning signs may be associated with the issue or condition described?
A3) Until the recall remedy is performed, owners are advised to park their vehicles outdoors. This condition may declare with a “service brake system” malfunction indicator lamp.
Q4) What is the remedy/repair?
A4) Dealers will replace the master cylinder pressure sensor. Dealers will also inspect the associated wire harness and replace if necessary.
Q5) What is the safety risk? Is the vehicle safe to drive?
A5) If brake fluid shorts the brake pressure switch and the associated fuse, the circuit can generate excessive heat that could result in a fire, increasing the risk of injury. An underhood fire may occur when the vehicle is off and possibly unattended.
Q6) Does the customer have to pay for this remedy/repair?
A6) No, this inspection/repair will be done at no cost to the customer.
Q7) Is the remedy/repair available now?
A7) No, when a sufficient quantity of parts are available, the recall bulletin will be released, and dealers can begin repairing vehicles.
Q8) What should customers do until recall repairs can be completed? Are there any special instructions?
A8) Until the recall remedy is performed, owners are advised to park their vehicles outdoors. This condition may declare with a “service brake system” malfunction indicator lamp.
Q9) How can customers check to see if their vehicle is involved in this field action?
A9) Customers who own a vehicle involved in the field action will be notified by mail by General Motors, but they may also check their Vehicle Identification Number (VIN) for field actions in GM Owner Center at https://my.gm.com/recalls or via NHTSA’s website at https://vinrcl.safercar.gov/vin/.
Q10) If customers are concerned, can they get a rental car or courtesy transportation?
A10) Courtesy transportation is not applicable to Medium Duty vehicles. Towing is covered to the nearest Chevrolet Medium Duty dealer if your vehicle cannot be driven because
Frequently Asked Questions (FAQs) for Safety Recall N222375270
Brake Pressure Switch Connector Fire
of a warrantied defect. Please refer to Warranty Administration Bulletin #07-00-89-037: Warranty Administration – GM Courtesy Transportation and Roadside Assistance Programs for further information.
**************************************************************************************************************
Frequently Asked Questions (FAQs) for Safety Recall N222375270
Brake Pressure Switch Connector Fire
These questions and answers are being provided to help GM dealers respond to inquiries from involved vehicle owners about the Safety Recall identified above.
Q1) Which vehicles are involved?
A1) Certain 2019 – 2023 model year Chevrolet Silverado Medium Duty 4500HD/5500HD/6500HD vehicles
Q2) What is the issue or condition?
A2) These vehicles may have a brake pressure sensor assembly that allows brake fluid to leak beyond the diaphragm seal into the pressure switch. The brake fluid may seep into the sensor’s electrical components and short the brake pressure switch and the associated fuse.
Q3) What symptoms may be experienced? What warning signs may be associated with the issue or condition described?
A3) Until the recall remedy is performed, owners are advised to park their vehicles outdoors. This condition may declare with a “service brake system” malfunction indicator lamp.
Q4) What is the remedy/repair?
A4) Dealers will replace the master cylinder pressure sensor. Dealers will also inspect the associated wire harness and replace if necessary.
Q5) What is the safety risk? Is the vehicle safe to drive?
A5) If brake fluid shorts the brake pressure switch and the associated fuse, the circuit can generate excessive heat that could result in a fire, increasing the risk of injury. An underhood fire may occur when the vehicle is off and possibly unattended.
Q6) Does the customer have to pay for this remedy/repair?
A6) No, this inspection/repair will be done at no cost to the customer.
Q7) Is the remedy/repair available now?
A7) Yes, please see the attached bulletin for details.
Q8) What should customers do until recall repairs can be completed? Are there any special instructions?
A8) Until the recall remedy is performed, owners are advised to park their vehicles outdoors. This condition may declare with a “service brake system” malfunction indicator lamp.
Q9) How can customers check to see if their vehicle is involved in this field action?
A9) Customers who own a vehicle involved in the field action will be notified by mail by General Motors, but they may also check their Vehicle Identification Number (VIN) for field actions in GM Owner Center at https://my.gm.com/recalls or via NHTSA’s website at https://vinrcl.safercar.gov/vin/.
Q10) If customers are concerned, can they get a rental car or courtesy transportation?
A10) Courtesy transportation is not applicable to Medium Duty vehicles. Towing is covered to the nearest Chevrolet Medium Duty dealer if your vehicle cannot be driven because of a warrantied defect. Please refer to Warranty Administration Bulletin #07-00-89-037:
Frequently Asked Questions (FAQs) for Safety Recall N222375270
Brake Pressure Switch Connector Fire
Warranty Administration – GM Courtesy Transportation and Roadside Assistance Programs for further information.
**************************************************************************************************************
IMPORTANT SAFETY RECALL
May 2023
This notice applies to your vehicle, VIN: __________________________________
Dear General Motors Customer:
This notice is sent to you in accordance with the National Traffic and Motor Vehicle Safety Act.
General Motors has decided that a defect which relates to motor vehicle safety exists in certain 2019 – 2023 model year Chevrolet Silverado Medium Duty 4500HD/5500HD/6500HD vehicles equipped with a 6.6L Duramax Diesel engine. As a result, GM is conducting a safety recall. We apologize for this inconvenience. However, we are concerned about your safety and continued satisfaction with our products.
IMPORTANT
• Your vehicle is involved in GM safety recall N222375270.
• Until the recall remedy is performed, owners are advised to park their vehicles outdoors. This condition may declare with a “service brake system” malfunction indicator lamp.
Why is your vehicle being recalled?
These vehicles may have a brake pressure sensor assembly that allows brake fluid to leak beyond the diaphragm seal into the pressure switch. The brake fluid may seep into the sensor’s electrical components and short the brake pressure switch and the associated fuse. If brake fluid shorts the brake pressure switch and the associated fuse, the circuit can generate excessive heat that could result in a fire, increasing the risk of injury. An underhood fire may occur when the vehicle is off and possibly unattended.
What will we do?
Parts to repair your vehicle are not currently available, but when parts are available, your GM dealer will replace the master cylinder pressure sensor. Dealers will also inspect the associated wire harness and replace if necessary. This service will be performed for you at no charge.
We are working as quickly as possible to correct this condition. When parts are available, we will send you another letter asking you to take your vehicle to your GM dealer to have your vehicle serviced. You can also check the status of this recall at: https://my.gm.com/recalls. If you have already paid for repairs for this condition, you may submit those charges using the reimbursement request form that will be provided with the next letter.
Until the recall remedy is performed, owners are advised to park their vehicles outdoors. This condition may declare with a “service brake system” malfunction indicator lamp.
Do you have questions?
If you have questions or concerns that your dealer is unable to resolve, please contact the appropriate Customer Assistance Center at the number listed below.
Division
Number
Text Telephones (TTY)
Chevrolet
1-800-630-2438
1-800-833-2438
Puerto Rico – English
1-800-496-9992
Puerto Rico – Español
1-800-496-9993
Virgin Islands
1-800-496-9994
For the hearing or speech impaired, please contact our Customer Assistance Center using the Telecommunication Relay Service by dialing 711 then providing the appropriate Customer Assistance Center number for your vehicle.
If after contacting your dealer and the Customer Assistance Center, you are still not satisfied we have done our best to remedy this condition without charge and within a reasonable time, you may wish to write the Administrator, National Highway Traffic Safety Administration, 1200 New Jersey Avenue, SE., Washington, DC 20590, or call the toll-free Vehicle Safety Hotline at 1.888.327.4236 (TTY 1.800.424.9153), or go to http://www.nhtsa.gov. The National Highway Traffic Safety Administration Campaign ID Number for this recall is 23V266.
Federal regulation requires that any vehicle lessor receiving this recall notice must forward a copy of this notice to the lessee within ten days.
Regina Carto
Vice President
Global Vehicle Safety and Systems
GM Recall: N222375270
**************************************************************************************************************
Safety Recall
N222375270 Brake Pressure Switch Connector Fire
Copyright 2023 General Motors. All Rights Reserved. Page 1 of 15
Release Date:
June 2023
Revision:
00
Attention:
Important: The wire harness should only be ordered when inspection determines that it is necessary, and only order the battery terminal nut if inspection determines the wire harness needs to be replaced. DO NOT order the harness unless required. The expected failure rate is very low and new parts will not be necessary for every vehicle.
It is a violation of Federal law for a dealer to deliver a new motor vehicle or any new or used item of motor vehicle equipment (including a tire) covered by this notification under a sale or lease until the defect or noncompliance is remedied.
Vehicles involved in this recall were placed on stop delivery April 13, 2023. Once the service procedure contained in this bulletin has been performed on the vehicle, the vehicle is released from stop delivery and the vehicle can be delivered to the customer.
All involved vehicles that are in dealer inventory must be held and not delivered to customers, dealer traded, or used for demonstration purposes until the repair contained in this bulletin has been performed on the vehicle.
ONLY Chevrolet Medium Duty dealers can complete this recall repair.
Make
Model
Model Year
RPO
Description
From
To
Chevrolet
Silverado 4500HD/5500HD/6500HD
2019
2023
L5D
6.6L Duramax Diesel Engine
Involved vehicles are marked “Open” on the Investigate Vehicle History screen in GM Global Warranty Management system. This site should always be checked to confirm vehicle involvement prior to beginning any required inspections and/or repairs.
Condition
General Motors has decided that a defect which relates to motor vehicle safety may exist in certain 2019-2023 model year Chevrolet Silverado Medium Duty 4500HD/5500HD/6500HD vehicles. These vehicles may have a brake pressure sensor assembly that allows brake fluid to leak beyond the diaphragm seal into the pressure switch. The brake fluid may seep into the sensor’s electrical components and short the brake pressure switch and the associated fuse. If brake fluid shorts the brake pressure switch and the associated fuse, the circuit can generate excessive heat that could result in a fire, increasing the risk of injury. An underhood fire may occur when the vehicle is off and possibly unattended.
Correction
Dealers will replace the master cylinder pressure sensor. Dealers will also inspect the associated wire harness and replace if necessary.
Parts
Important: * The wire harness should only be ordered when inspection determines that it is necessary, and only order the battery terminal nut if inspection determines the wire harness needs to be replaced. DO NOT order the harness unless required. The expected failure rate is very low and new parts will not be necessary for every vehicle.
Quantity
Part Name
Part No.
1
Brake Pressure Wiring Switch
19409480
1
Wire Harness*
19407615
1
Wire Harness*
19408341
1
Battery Terminal Nut*
19405196
As Required
DOT 3 Motor Vehicle Brake Fluid
+NPN
As Required
Blue Dielectric Grease**
+NPN
As Required
14-inch cable tie strap
+NPN
Important: * The wire harness should only be ordered when inspection determines that it is necessary, and only order the battery terminal nut if inspection determines the wire harness needs to be replaced. DO NOT order the harness unless required. The expected failure rate is very low and new parts will not be necessary for every vehicle.
** NANO2133005 or equivalent locally sourced.
+ Locally sourced non-GM material.
Safety Recall
N222375270 Brake Pressure Switch Connector Fire
Page 2 of 15
Reminder: Parts may be removed from Retail Inventory Management (RIM). Dealers should review the affected parts to confirm RIM managed status. Parts may have quantity limiters in effect.
Warranty Information
Labor Operation
Description
Labor Time
Trans. Type
Net Item
9106844
Inspect and Replace Brake Pressure Switch (includes brake system bleed)
0.8
ZFAT
*
9106845
Replace Brake Jumper Harness and Brake Pressure Switch (includes inspection and brake system bleed)
1.2
ZFAT
**
9106846
Customer Reimbursement Approved
ZFAT
***
– For USA and Canada dealers only
N/A
– For Export dealers only
0.2
9106847
Customer Reimbursement Denied – For USA dealers only
N/A
ZFAT
****
9106848
Floor Plan Reimbursement – NEW INVENTORY ONLY
N/A
ZFAT
*****
9106849
Working Capital Assistance Program Reimbursement – USED INVENTORY ONLY
N/A
ZFAT
******
Important: The wire harness should only be ordered when inspection determines that it is necessary, and only order the battery terminal nut if inspection determines the wire harness needs to be replaced. DO NOT order the harness unless required. The expected failure rate is very low and new parts will not be necessary for every vehicle.
Note: To avoid having to “H” route the customer reimbursement / floor plan / WCAP transaction for approval, it must be submitted prior to the repair transaction.
* The amount identified in “Net Item” should represent the actual sum total of the current GMCCA Dealer net price for DOT 3 Motor Vehicle Brake Fluid to perform the required repairs, not to exceed $7.00 USD.
** The amount identified in “Net Item” should represent the actual sum total of the current GMCCA Dealer net price for DOT 3 Motor Vehicle Brake Fluid and Blue Dielectric Grease perform the required repairs, not to exceed $36.30 USD.
*** Submit the dollar amount reimbursed to the Customer in Net/Reimbursement. Submit $20.00 USD administrative allowance in Net/Admin Allowance.
**** Submit $10.00 USD administrative allowance in Net/Admin Allowance.
Floor Plan Reimbursement – NEW INVENTORY ONLY
***** For vehicles eligible for floor plan reimbursement, the amount should be submitted in Net Item/Miscellaneous. This amount should represent the product of the vehicle’s average daily interest rate (see table below) multiplied by the actual number of days the vehicle was in dealer inventory and not available for sale. This reimbursement is limited to the number of days from the date of the stop delivery message (April 13, 2023) to the date the repair is completed, and the vehicle is ready for sale.
Vehicle
Floor Plan Reimbursement Amount
USA
2019 Chevrolet Silverado 4500HD/5500HD/6500HD
$14.00
2020 Chevrolet Silverado 4500HD/5500HD/6500HD
$14.83
2021 Chevrolet Silverado 4500HD/5500HD/6500HD
$15.20
2022 Chevrolet Silverado 4500HD/5500HD/6500HD
$16.00
2023 Chevrolet Silverado 4500HD/5500HD/6500HD
$18.19
Working Capital Assistance Program (WCAP) Reimbursement – USED INVENTORY ONLY
Note: To avoid having to “H” route the WCAP transaction for approval, it must be submitted prior to the repair transaction.
Important: The WCAP ZSET transaction labor code, 9800106, provided in the dealer message sent on April 27, 2023, must have been submitted prior to the submittal of the ZFAT transaction labor code or the claim will reject.
****** For vehicles eligible under the Working Capital Assistance Program, the amount should be submitted in Net Item/Miscellaneous. This amount has been calculated to a daily value for the days that the vehicle was in used dealer inventory and not available for sale. This reimbursement is limited to the number of days from the date of the stop sale/stop delivery order (April 13, 2023) to the date the inspection or repair closed the recall bulletin.
Safety Recall
N222375270 Brake Pressure Switch Connector Fire
Page 3 of 15
Vehicle
Working Capital Assistance Program Reimbursement Amount
USA
2019 Chevrolet Silverado 4500HD/5500HD/6500HD
$23.33
2020 Chevrolet Silverado 4500HD/5500HD/6500HD
$24.72
2021 Chevrolet Silverado 4500HD/5500HD/6500HD
$25.34
2022 Chevrolet Silverado 4500HD/5500HD/6500HD
$26.66
2023 Chevrolet Silverado 4500HD/5500HD/6500HD
$30.31
Service Procedure
1. Park vehicle on a flat surface.
2. Shift transmission to Park or Neutral and set the Parking Brake.
3. Turn vehicle to Key OFF position.
4. Install wheel chocks.
5. Unlatch and open the hood. 6361845
Note: Vehicles built on or before 11/30/2020 will have the Brake Pressure Switch located in position (1). Vehicles built on or after 12/01/2020 will have the Brake Pressure Switch located in position (2).
6. Locate the Brake Pressure Switch (1) or (2) depending on build date.
Safety Recall
N222375270 Brake Pressure Switch Connector Fire
Page 4 of 15
6361848
7. Locate the Brake Booster Pressure Switch Connector (1), shown above.
8. Disconnect the Harness Connector (2) from the Brake Pressure Switch (1).
6361847
Note: Some vehicles may have dielectric grease in the switch/connector, this should not be confused with brake fluid.
9. Inspect for presence of brake fluid at both the Brake Pressure Switch Terminals (1) and Harness Connector (2).
• If there is NO brake fluid in the switch terminals or harness connector, proceed to step 10.
• If there is brake fluid present in the switch terminals or harness connector, proceed to step 13.
Safety Recall
N222375270 Brake Pressure Switch Connector Fire
Page 5 of 15
6361850
10. Locate both 5-amp fuses (2) and remove the protective cover (1).
11. Remove the fuses (2).
12. Inspect for presence of brake fluid in both fuse connections (3).
• If brake fluid is NOT present in the fuse connectors, reinstall fuses and protective covers. Proceed to step 13.
• If brake fluid is present in either fuse connectors, it is NOT necessary to reinstall fuses and protective covers, proceed to step 13.
Caution: Ensure NO brake fluid gets into the connector end of the NEW Brake Pressure Switch. If brake fluid gets into the connector end, the NEW Brake Pressure Switch MUST be replaced.
Note: Before proceeding to the next step, you MUST have new switch in your hand.
Note: Verify that the brake fluid level is above the “ADD” line on the master cylinder.
13. Pour a few drops of NEW DOT 3 brake fluid into the NEW Brake Pressure Switch.
Caution: To prevent damage to property, utilize a back-up style wrench to prevent brake line damage. Failure to do so can result in damage to the brake line.
Caution: To prevent damage to property, ensure brake pressure switch connector is shielded from fluids, debris, and other contaminants. Failure to do so can result in damage to property.
14. Remove the existing Brake Pressure Switch and quickly install the NEW Brake Pressure Switch, tighten to 48 Nm (35 lb ft).
• If brake fluid was present in steps 9 and/or 12, proceed to step 15.
• If brake fluid was NOT present in steps 9 and/or 12, proceed to step 39.
Note: The Battery Terminal Nut is not listed as a single use component in SI, however for this procedure it is to be DISCARDED.
15. Disconnect the Negative Battery Cable and DISCARD the Battery Terminal Nut. Refer to Battery Negative Cable Disconnection and Connection in SI.
Safety Recall
N222375270 Brake Pressure Switch Connector Fire
Page 6 of 15
6361852
16. Disconnect the Back-up Booster Pump Motor Jumper Wire Harness Connector (1) from the Center Chassis Harness
Connector (2).
6361853
17. Cut and discard the Cable Tie Strap (4) connecting the Diode (5) to the Relay Mounting Bracket (2).
18. Disconnect the Relay Connector (6).
19. If the vehicle being worked on was built on or before 11/30/2020, perform step 19A. If the vehicle being worked on
was built on or after 12/01/2020, perform step 19B.
A. Disconnect the Master Cylinder Fluid Level Sensor mounted on the Brake Fluid Reservoir, Low-Pressure Brake
Switch Connector mounted on the Master Cylinder, and the Brake Booster Flow Switch mounted on the Hydromax
Booster.
Safety Recall
N222375270 Brake Pressure Switch Connector Fire
Page 7 of 15
B. Disconnect the Master Cylinder Fluid Level Sensor mounted on the Brake Fluid Reservoir and Brake Booster
Flow Switch mounted on the Hydromax Booster.
6361855
20. Remove the Bolt (1) securing the Ground Wire (2) to the Hydromax Brake Booster (3).
21. Reposition the Ground Wire (2).
6361856
22. Remove the Nut and Lock Washer (2) securing the Power Wire (1) to the Booster Pump Motor Terminal (3).
23. Reposition the Wire (1).
Safety Recall
N222375270 Brake Pressure Switch Connector Fire
Page 8 of 15
6366283
Note: The wire harness routing varies based upon build date. Vehicles built on or before 11/30/2020 are shown on the left (1). Vehicles built on or after 12/01/2020 are shown on the right (2).
24. Record the Wire Harness routing and the location of Cable Tie Straps and Clipping Saddles.
25. Cut and discard Cable Tie Straps securing the Wire Harness.
26. Remove and DISCARD the Wire Harness.
Caution: To prevent damage to property, use caution while routing harness. Failure to do so can lead to damage to harness.
27. Using previously recorded routing and slipping locations, route new harness as noted in step 24, installing cable tie straps where previously located. 6361856
Safety Recall
N222375270 Brake Pressure Switch Connector Fire
Page 9 of 15
28. Position the Ring Terminal of the Power Wire (1) over the Booster Pump Motor Terminal (3).
29. Install and tighten the lock washer and nut (2) to 2 Nm (17 lb in).
Caution: To prevent damage to property, ensure even application of dielectric grease to backup pump power terminal nut and booster pump ground bolt. Failure to do so can result in damage to property.
30. Evenly apply dielectric grease to the top of the Backup Pump Power Terminal Nut (2). 6361855
31. Evenly apply dielectric grease to both sides of the Ground Ring Terminal Eyelet on the Ground Wire (2).
32. Position the Ground Bolt (1) through the Ring Terminal Eyelet of the Ground Wire (2) and into the Hydromax Brake Booster (3).
33. Tighten to Ground Bolt (1) to 11.5 Nm (102 lb in).
34. If the vehicle being worked on was built on or before 11/30/2020, perform step 34A. If the vehicle being worked on was built on or after 12/01/2020, perform step 34B.
A. Connect the Master Cylinder Fluid Level Sensor mounted on the Brake Fluid Reservoir, Low-Pressure Brake Switch Connector mounted on the Master Cylinder, and the Brake Booster Flow Switch mounted on the Hydromax Booster.
B. Connect the Master Cylinder Fluid Level Sensor mounted on the Brake Fluid Reservoir and the Brake Booster Flow Switch mounted on the Hydromax Booster.
Safety Recall
N222375270 Brake Pressure Switch Connector Fire
Page 10 of 15
6361853
35. Connect the relay connector (6). 6361852
36. Connect the Booster Pumper Motor Jumper Harness Connector (1) to the Center Chassis Harness Connector (2).
Safety Recall
N222375270 Brake Pressure Switch Connector Fire
Page 11 of 15
6361853
37. Use a cable tie strap to secure the Diode (5) to the Relay Mounting Bracket (2).
38. Using a cable tie strap, secure both fuse holders to the Brake Jumper Harness. 6361847
39. Route and connect the Hydraulic Brake Pressure Switch (2) to the Hydraulic Brake Pressure Switch Harness Connector (1).
Caution: To prevent damage to property, ensure brake fluid does not contact painted surfaces. Failure to do so can result in damage to property.
Note: Verify brake fluid level is filled to the “MAX” level with NEW DOT 3 brake fluid before performing brake bleeding procedure.
40. Bleed the FRONT brakes. Refer to Hydraulic Brake System Bleeding in SI.
Safety Recall
N222375270 Brake Pressure Switch Connector Fire
Page 12 of 15
6361848
41. Using a cable tie strap (3) secure the Brake Booster Flow Switch Harness (2).
• If the battery was disconnected, proceed to step 42.
• If the battery was NOT disconnected, proceed to step 45.
42. Using a wire brush, electronic contact cleaner, and compressed shop air, clean the negative battery terminal components.
43. Apply BLUE dielectric grease to the Battery Terminal Stud, Negative Battery Cable Ring Terminal, and threads of the NEW Battery Stud Nut.
44. Connect the Battery Negative Cable. Refer to Battery Negative Cable Disconnection and Connection in SI.
45. Turn the ignition switch to key ON, engine OFF position.
46. Depress the brake pedal to verify Backup Booster Pump Motor Operation.
47. Turn the ignition switch to key OFF position.
48. Close and latch the hood.
49. Remove the wheel chocks.
Dealer Responsibility – For USA
It is a violation of Federal law for a dealer to deliver a new motor vehicle or any new or used item of motor vehicle equipment (including a tire) covered by this notification under a sale or lease until the defect or noncompliance is remedied.
The US National Traffic and Motor Vehicle Safety Act provides that each vehicle that is subject to a recall of this type must be adequately repaired within a reasonable time after the customer has tendered it for repair. A failure to repair within sixty days after tender of a vehicle is prima facie evidence of failure to repair within a reasonable time. If the condition is not adequately repaired within a reasonable time, the customer may be entitled to an identical or reasonably equivalent vehicle at no charge or to a refund of the purchase price less a reasonable allowance for depreciation. To avoid having to provide these burdensome remedies, every effort must be made to promptly schedule an appointment with each customer and to repair their vehicle as soon as possible. In the recall notification letters, customers are told how to contact the US National Highway Traffic Safety Administration if the recall is not completed within a reasonable time.
Safety Recall
N222375270 Brake Pressure Switch Connector Fire
Page 13 of 15
Dealer Responsibility – All
All new, used, GM Certified Used, courtesy transportation vehicles, dealer shuttle vehicles, etc. in dealers’ possession and subject to this recall must be held and inspected/repaired per the service procedure of this bulletin before customers take possession of these vehicles. Involved vehicles must be held and not delivered to customers, dealer-traded, released to auction, used for demonstration, or any other purpose.
All GM Certified Used vehicles currently in the dealers’ inventory within the Certified Pre-Owned Inventory System (CPOIS) will be de-certified and must be held and remedied per the service procedure in this bulletin. Upon submitting an accepted/paid warranty transaction in the Global Warranty Management (GWM) system, the vehicle can be re-certified for sale within the CPOIS system, or once again be used in the CTP program.
Dealers are to service all vehicles subject to this recall at no charge to customers, regardless of mileage, age of vehicle, or ownership, from this time forward.
Customers who have recently purchased vehicles sold from your vehicle inventory, and for which there is no customer information indicated on the dealer listing, are to be contacted by the dealer. Arrangements are to be made to make the required correction according to the instructions contained in this bulletin. A copy of the customer letter is provided in this bulletin for your use in contacting customers. Recall follow-up cards should not be used for this purpose, since the customer may not as yet have received the notification letter. In summary, whenever a vehicle subject to this field action enters your vehicle inventory you must take the steps necessary to ensure the program correction has been made before selling the vehicle. In addition, for vehicles entering your facility for service, you are required to ensure the customer is aware of the open field action and make every reasonable effort to implement the program correction as set forth in this bulletin prior to releasing the vehicle.
Dealer Reports
For dealers with involved vehicles, a listing has been prepared and will be available through GM GlobalConnect Maxis Field Action Reports or sent directly to export dealers. The Inventory tab of the dealer reports will contain VINs that apply to this recall. This information is intended to assist dealers with the PROMPT COMPLETION of these vehicles. The Customer In-Service tab will contain customer names and addresses from Motor Vehicle Registration Records. The use of such motor vehicle registration data for any purpose other than follow-up necessary to complete this recall may be a violation of law in several states.
Customer Notification
General Motors will notify customers of this recall on their vehicle (see copy of customer letter included with this bulletin).
Customer Reimbursement
Customer requests for reimbursement of previously paid repairs to correct the condition described in the bulletin can be submitted at anytime to the dealer. See General Motors Service Policies and Procedures Manual, Product Field Action Customer Reimbursement Procedure or local Policies and Procedures, for details.
GM bulletins are intended for use by professional technicians, NOT a “do-it-yourselfer”. They are written to inform these technicians of conditions that may occur on some vehicles, or to provide information that could assist in the proper service of a vehicle. Properly trained technicians have the tools, equipment, safety instructions, and know-how to do a job properly and safely. If a condition is described, DO NOT assume that the bulletin applies to your vehicle, or that your vehicle will have that condition. See your dealer for information on whether your vehicle may benefit from the information.
We Support Voluntary Technician Certification
Safety Recall
N222375270 Brake Pressure Switch Connector Fire
Page 14 of 15
IMPORTANT SAFETY RECALL
July 2023
This notice applies to your vehicle, VIN: _____________________________________
Dear General Motors Customer:
This notice is sent to you in accordance with the National Traffic and Motor Vehicle Safety Act.
General Motors has decided that a defect, which relates to motor vehicle safety, exists in certain 2019-2023 model year Chevrolet Silverado Medium Duty 4500HD/5500HD/6500HD vehicles equipped with a 6.6L Duramax Diesel engine. As a result, GM is conducting a safety recall. We apologize for this inconvenience. However, we are concerned about your safety and continued satisfaction with our products.
IMPORTANT
• Your vehicle is involved in GM recall N222375270.
• Schedule an appointment with your GM dealer.
• This service will be performed for you at no charge.
• Until the recall remedy is performed, owners are advised to park their vehicles outdoors. This condition may declare with a “service brake system” malfunction indicator lamp.
Why is your vehicle being recalled?
These vehicles may have a brake pressure sensor assembly that allows brake fluid to leak beyond the diaphragm seal into the pressure switch. The brake fluid may seep into the sensor’s electrical components and short the brake pressure switch and the associated fuse. If brake fluid shorts the brake pressure switch and the associated fuse, the circuit can generate excessive heat that could result in a fire, increasing the risk of injury. An underhood fire may occur when the vehicle is off and possibly unattended.
What will we do?
Your Chevrolet dealer will replace the master cylinder pressure sensor. Dealers will also inspect the associated wire harness and replace if necessary. This service will be performed for you at no charge. Because of service scheduling requirements, it is likely that your dealer will need your vehicle longer than the actual inspection and service correction time of approximately 1-2 hours.
What should you do?
You should contact your GM dealer to arrange a service appointment as soon as possible.
When scheduling your appointment, confirm with the dealer that they service Medium Duty Trucks.
Did you already pay for this repair?
Even though you may have previously had repairs for this condition, you will still need to take your vehicle to your dealer for additional repairs. If you have already paid for repairs for the recall condition, please complete the enclosed reimbursement form and present it to your dealer with all required documents. Working with your dealer will expedite your request, however, if this is not convenient, you may mail the completed reimbursement form and all required documents to Reimbursement Department, PO Box 33170, Detroit, MI 48232-5170.
Do you have questions?
If you have any questions or concerns that your dealer is unable to resolve, please contact the appropriate Customer Assistance Center at the number listed below.
For the hearing or speech impaired, please contact our Customer Assistance Center using the Telecommunication Relay Service by dialing 711 then providing the appropriate Customer Assistance Center number for your vehicle.
Division
Number
Text Telephones (TTY)
Safety Recall
N222375270 Brake Pressure Switch Connector Fire
Page 15 of 15
Chevrolet
1-800-222-1020
711 / 1-800-833-2438
Puerto Rico – English
1-866-467-9700
Puerto Rico – Español
1-866-467-9700
Virgin Islands
1-866-467-9700
If after contacting your dealer and the Customer Assistance Center, you are still not satisfied we have done our best to remedy this condition without charge and within a reasonable time, you may wish to write the Administrator, National Highway Traffic Safety Administration, 1200 New Jersey Avenue, SE, Washington, DC 20590, or call the toll-free Vehicle Safety Hotline at 1.888.327.4236 (TTY 1.800.424.9153), or go to http://www.nhtsa.gov. The National Highway Traffic Safety Administration Campaign ID Number for this recall is 23V266.
Federal regulation requires that any vehicle lessor receiving this recall notice must forward a copy of this notice to the lessee within ten days.
Regina A. Carto
Vice President
Global Product Safety and Systems
Enclosure
GM Recall: N222375270
**************************************************************************************************************
IMPORTANT SAFETY RECALL
July 2023
This notice applies to your vehicle, VIN: _____________________________________
Dear General Motors Customer:
This notice is sent to you in accordance with the National Traffic and Motor Vehicle Safety Act.
General Motors has decided that a defect, which relates to motor vehicle safety, exists in certain 2019-2023 model year Chevrolet Silverado Medium Duty 4500HD/5500HD/6500HD vehicles equipped with a 6.6L Duramax Diesel engine. As a result, GM is conducting a safety recall. We apologize for this inconvenience. However, we are concerned about your safety and continued satisfaction with our products.
IMPORTANT
• Your vehicle is involved in GM recall N222375270.
• Schedule an appointment with your GM dealer.
• This service will be performed for you at no charge.
• Until the recall remedy is performed, owners are advised to park their vehicles outdoors. This condition may declare with a “service brake system” malfunction indicator lamp.
Why is your vehicle being recalled?
These vehicles may have a brake pressure sensor assembly that allows brake fluid to leak beyond the diaphragm seal into the pressure switch. The brake fluid may seep into the sensor’s electrical components and short the brake pressure switch and the associated fuse. If brake fluid shorts the brake pressure switch and the associated fuse, the circuit can generate excessive heat that could result in a fire, increasing the risk of injury. An underhood fire may occur when the vehicle is off and possibly unattended.
What will we do?
Your Chevrolet dealer will replace the master cylinder pressure sensor. Dealers will also inspect the associated wire harness and replace if necessary. This service will be performed for you at no charge. Because of service scheduling requirements, it is likely that your dealer will need your vehicle longer than the actual inspection and service correction time of approximately 1-2 hours.
What should you do?
You should contact your GM dealer to arrange a service appointment as soon as possible.
When scheduling your appointment, confirm with the dealer that they service Medium Duty Trucks.
Did you already pay for this repair?
Even though you may have previously had repairs for this condition, you will still need to take your vehicle to your dealer for additional repairs. If you have already paid for repairs for the recall condition, please complete the enclosed reimbursement form and present it to your dealer with all required documents. Working with your dealer will expedite your request, however, if this is not convenient, you may mail the completed reimbursement form and all required documents to Reimbursement Department, PO Box 33170, Detroit, MI 48232-5170.
Do you have questions?
If you have any questions or concerns that your dealer is unable to resolve, please contact the appropriate Customer Assistance Center at the number listed below.
For the hearing or speech impaired, please contact our Customer Assistance Center using the Telecommunication Relay Service by dialing 711 then providing the appropriate Customer Assistance Center number for your vehicle.
Division
Number
Text Telephones (TTY)
Chevrolet
1-800-222-1020
711 / 1-800-833-2438
Puerto Rico – English
1-866-467-9700
Puerto Rico – Español
1-866-467-9700
Virgin Islands
1-866-467-9700
If after contacting your dealer and the Customer Assistance Center, you are still not satisfied we have done our best to remedy this condition without charge and within a reasonable time, you may wish to write the Administrator, National Highway Traffic Safety Administration, 1200 New Jersey Avenue, SE, Washington, DC 20590, or call the toll-free Vehicle Safety Hotline at 1.888.327.4236 (TTY 1.800.424.9153), or go to http://www.nhtsa.gov. The National Highway Traffic Safety Administration Campaign ID Number for this recall is 23V266.
Federal regulation requires that any vehicle lessor receiving this recall notice must forward a copy of this notice to the lessee within ten days.
Regina A. Carto
Vice President
Global Product Safety and Systems
Enclosure
GM Recall: N222375270
**************************************************************************************************************
GM CUSTOMER CARE AND AFTERSALES
DCS6544
URGENT – DISTRIBUTE IMMEDIATELY
Date: April 27, 2023
Subject: N222375270 – Safety Recall
Brake Pressure Switch Connector Fire
Application for Used Vehicle Working Capital Assistance Program (WCAP)
Models: 2019-2023 Chevrolet Silverado Medium Duty 4500HD/5500HD/6500HD
Equipped with 6.6L Duramax Diesel Engine (RPO L5D)
To: All General Motors Dealers
On April 13, 2023, GM sent to all GM dealers GlobalConnect Message GCUS-3-2898 regarding safety recall N222375270.
The required repair to complete this recall is not yet available. Until further instructions are received, the involved vehicles that are in dealers’ possession (new or used vehicle inventory, GM Certified Used, courtesy transportation vehicles, dealer shuttle vehicles, etc.) must be held and cannot be delivered to customers, dealer-traded, released to auction, used for demonstration purposes or put to any other use.
This message is to inform dealers who have involved vehicles in their inventory that they can now apply for the used vehicle Working Capital Assistance Program (“WCAP”) for safety recall N222375270.
Before proceeding with the application process described below, dealers must verify vehicle eligibility based on the program terms and guidelines that were provided in GM GlobalConnect Message GCUS-9-14456 dated March 29, 2023. Applications submitted on ineligible vehicles are subject to chargeback of any incentives paid to the dealer under the WCAP. Because compensation and tracking requires visibility into dealers’ inventory, dealers must also have agreed to a Dealer Data Share agreement with GM in order to receive any compensation under this program.
To apply for the WCAP for safety recall N222375270, dealers must access the GM Global Warranty Management (GWM) system and submit a “ZSET” warranty transaction using the labor code provided below for each eligible vehicle. This zero dollar special transaction type is the dealer’s application for compensation and constitutes a representation from the dealer that the vehicle is eligible for WCAP assistance.
Note: Acceptance of the warranty transaction does not ensure vehicle eligibility or guarantee the provision of any assistance as defined by program terms and guidelines.
Labor Code
Description
Labor Time
Trans Code
9800106
Working Capital Assistance for Safety Recall N222375270
N/A
ZSET
To be eligible for the WCAP, a vehicle must be in dealer inventory at the time the related field action bulletin is released. If a vehicle has been delivered, wholesaled or otherwise disposed of prior to release of the bulletin, the vehicle is not eligible for assistance. Additionally, recalled vehicles taken in on trade may be eligible for assistance if the dealer immediately reports the vehicle in used vehicle inventory via its Dealer Management System (DMS) and makes application through the GWM system.
To ensure that GM is receiving daily inventory information, which is necessary to process payments and make eligibility determinations under the WCAP, the dealer’s vehicles must be properly identified in the dealership’s DMS. A daily feed of this information is provided to GM through the Dealer Data Share (DDS) agreement.
Beginning with the 1st quarter of 2019, all WCAP payments will be facilitated through the Global Warranty Management (GWM) system. For each eligible vehicle, a qualifying dealer will submit for WCAP vehicle enrollment with a “ZSET” transaction type and for reimbursement with a “ZFAT” transaction type both through the GWM system. If approved, a WCAP credit for that vehicle will be issued through the GWM system similar to any other warranty credit. WCAP submission instructions and the required labor code will also be provided in the appropriate field action bulletin. Each WCAP transaction being credited will be clearly identified on the dealer’s daily credit memo.
In order to receive payment, a dealer must have timely reported the vehicle in used vehicle inventory, retained the vehicle until the related field action bulletin is released, and properly applied for the WCAP payment. The vehicle must also be otherwise eligible under WCAP rules and guidelines.
GM reserves the right to amend, modify, terminate, or cancel this program at any time in its sole discretion.
END OF MESSAGE GM CUSTOMER CARE AND AFTERSALES
**************************************************************************************************************
GLOBAL SAFETY FIELD INVESTIGATIONS
DCS6532
URGENT – DISTRIBUTE IMMEDIATELY
Date: April 13, 2023
Subject: Stop Delivery Order for Safety Recall N222375270
Brake Pressure Switch Connector Fire
Models: 2019-2023 Chevrolet Silverado Medium Duty 4500HD/5500HD/6500HD
Equipped with 6.6L Duramax Diesel Engine (RPO L5D)
To: All General Motors Medium Duty Dealers
STOP DELIVERY ORDER
Effective immediately, stop the delivery of certain 2019-2023 model year Chevrolet Silverado Medium Duty 4500HD/5500HD/6500HD vehicles in new or used vehicle inventory. General Motors has notified the National Highway Traffic Safety Administration (NHTSA) about a safety recall that involves these vehicles. The GM recall number is N222375270.
It is a violation of federal law for a dealer to deliver a new motor vehicle or any new or used item of motor vehicle equipment (including a tire) covered by this notification until the defect is remedied.
These vehicles may have a brake pressure sensor assembly that allows brake fluid to leak beyond the diaphragm seal into the pressure switch. The brake fluid may seep into the sensor’s electrical components and short the brake pressure switch and the associated fuse. If brake fluid shorts the brake pressure switch and the associated fuse, the circuit can generate excessive heat that could result in a fire, increasing the risk of injury. An underhood fire may occur when the vehicle is off and possibly unattended.
Until the recall remedy is performed, owners are advised to park their vehicles outdoors. This condition may declare with a “service brake system” malfunction indicator lamp.
Parts are not currently available, but when parts are available, dealers will replace the master cylinder pressure sensor. Dealers will also inspect the associated wire harness and replace if necessary.
Until further instructions are received, involved vehicles that are in dealers’ possession (new or used vehicle inventory, GM Certified Used, courtesy transportation vehicles, dealer shuttle vehicles, etc.) must be held and not delivered to customers, dealer-traded, released to auction, used for demonstration purposes or any other dealer use. All GM Certified Used vehicles currently in the dealers’ inventory within the Certified Pre-Owned Inventory System (CPOIS) will be de-certified.
The Investigate Vehicle History (IVH) screen in the Global Warranty Management (GWM) system has been updated for this recall. This action has been taken to assist dealers with determining which vehicles are involved so they can properly respond to customer inquiries.
A list of involved vehicles that have been identified as being in dealer new vehicle inventory is attached to this message. It is sorted by dealer Business Associate Code (BAC) for easy reference. Your dealership’s BAC will not be listed if none of the involved vehicles are currently in your new vehicle inventory. To identify involved vehicles in dealer used inventory, run an Open VIN Report or Field Action Initiation Report using Field Action Reports-GFAM within the Maxis Dealer Application in GlobalConnect.
Frequently Asked Questions Document (FAQs)
Attached to this message you will find a document that addresses the ten most likely questions customers may have regarding this Safety Recall. Please use this information as an aid to confidently answer customer concerns.
Until the recall bulletin is released, the Investigate Vehicle History (IVH) screen in the Global Warranty Management (GWM) system will display “04/13/2023” under Release Date and “Incomplete – Remedy Not Available” under Status. This means the required repair is not yet available and dealers should not attempt to perform any repairs.
We are working with the supplier to obtain the required parts as quickly as possible. When a sufficient quantity of parts are available, the recall bulletin will be released and dealers can begin repairing vehicles.
END OF MESSAGE
GLOBAL SAFETY FIELD INVESTIGATIONS
**************************************************************************************************************
Reference Number: 202306230005
GLOBAL SAFETY FIELD INVESTIGATIONS
DCS6610
URGENT – DISTRIBUTE IMMEDIATELY
Date: June 23, 2023
Subject: N222375270 – Safety Recall
Brake Pressure Switch Connector Fire
Models: 2019-2023 Chevrolet Silverado 4500HD/5500HD/6500HD
Equipped with 6.6L Duramax Diesel Engine (RPO L5D)
To: All General Motors Medium Duty Dealers
General Motors is releasing Safety Recall N222375270 today. The total number of U.S. vehicles involved is approximately 40,000. Please see the attached bulletin for details.
Vehicles involved in this recall were placed on stop delivery April 13, 2023. Once the service procedure contained in the bulletin has been performed on the vehicle, the vehicle is released from stop delivery and the vehicle can be delivered to the customer.
Important: The wire harness should only be ordered when inspection determines that it is necessary, and only order the battery terminal nut if inspection determines the wire harness needs to be replaced. DO NOT order the harness unless required. The expected failure rate is very low and new parts will not be necessary for every vehicle.
Frequently Asked Questions Document (FAQs)
Attached to this message you will find a document that addresses the most likely questions customers may have regarding this Safety Recall. Please use this information as an aid to confidently answer customer concerns.
Working Capital Assistance Program (WCAP) Eligibility
Vehicles which were in dealer inventory at the time of this bulletin release were eligible for WCA. Please refer to the attached bulletin and GlobalConnect Message GCUS-9-14456 for additional information.
Customer Letter Mailing
The customer letter mailing will begin in the near future.
Global Warranty Management (GWM)
The Required Field Action section on the Investigate Vehicle History (IVH) screen will be updated June 23, 2023. A list of vehicles in dealer inventory is attached to this message.
END OF MESSAGE
GLOBAL SAFETY FIELD INVESTIGATIONS
**************************************************************************************************************
OMB Control No.: 2127-0004
Part 573 Safety Recall Report 23V-266
The information contained in this report was submitted pursuant to 49 CFR §573
Manufacturer Name : Submission Date :
General Motors, LLC APR 14, 2023 NHTSA Recall No. : 23V-266 Manufacturer Recall No. : N222375270 Manufacturer Information :
Manufacturer Name : General Motors, LLC Address : 29427 Louis Chevrolet Road
MAIL CODE 480-210-2V WARREN MI 48093
Company phone : 586-596-1733
Population :
Number of potentially involved : 40,428 Estimated percentage with defect : 1 %
Vehicle Information : Vehicle 1 : 2019-2023 Chevrolet 4500HD/5500HD/6500HD Vehicle Type :
Body Style :
Power Train : NR
Descriptive Information : Manufacturing records were used to identify vehicles built within the affected build window. Vehicles prior to 2019 model year use a different design.
Production Dates : MAY 23, 2018 – APR 05, 2023 VIN Range 1 : Begin : NR End : NR Not sequential
Description of Defect :
Description of the Defect : General Motors has decided that a defect which relates to motor vehicle safety may exist in certain 2019 – 2023 model year Chevrolet Silverado Medium Duty 4500HD/5500HD/6500HD vehicles. These vehicles may have a brake pressure sensor assembly that allows brake fluid to leak beyond the diaphragm seal into the pressure switch. The brake fluid may seep into the sensor’s electrical components and short the brake pressure switch and the associated fuse.
FMVSS 1 : NR FMVSS 2 : NR
Description of the Safety Risk : If brake fluid shorts the brake pressure switch and the associated fuse, the
circuit can generate excessive heat that could result in a fire, increasing the risk of injury. An underhood fire may occur when the vehicle is off and possibly unattended. Description of the Cause : A zinc nickel plating and sealant used to inhibit corrosion within the pressure Part 573 Safety Recall Report 23V-266 Page 2 Identification of Any Warning
that can Occur : sensor assembly may cause delamination of the sealant which results in small fragments of sealer underneath the diaphragm during assembly which allows brake fluid to slowly seep past the seal.
Until the recall remedy is performed, owners are advised to park their vehicles outdoors. This condition may declare with a “service brake system” malfunction indicator lamp. Involved Components : Component Name 1 : SWITCH, BRK PRESS WRNG (W/O TEE CONNECTOR)
Component Description : Brake master cylinder pressure sensor Component Part Number : 19407495 Supplier Identification : Component Manufacturer
Name : Navistar, Inc.
Address : 2701 Navistar Dr.
Lisle Illinois 60532 Country : United States Chronology :
On August 9, 2022, GM opened a product investigation following a claim of a vehicle fire on a 2019 Chevrolet Silverado Medium Duty vehicle. As part of that investigation, GM coordinated with Navistar, the manufacturer of the subject vehicles, to review field data and warranty returned brake pressure sensors. While a series of tests failed to duplicate the SUFS vehicle’s condition, on January 25, 2023, a warranty returned sensor and harness was identified which exhibited signs of heat damage. This part was subjected to more detailed analysis, including X-ray scans which were completed on February 13, 2023, followed by chemistry laboratory analysis which was completed on February 28, 2023. The results from these analyses revealed the presence of brake fluid past the diaphragm seal, into the brake pressure switch and through the actual wire harness into the pump’s fuse circuit. Analysis of the returned components also revealed delamination of the corrosion inhibiting sealant, which allowed slow seepage of the brake fluid past the diaphragm seal. On March 30, 2023, Navistar reported one potentially related field incident involving a part with alleged heat damage. On April 5, 2023, Navistar provided GM a list of potentially affected vehicle VINs. The information contained in this report was submitted pursuant to 49 CFR §573 Part 573 Safety Recall Report 23V-266
Page 3
The information contained in this report was submitted pursuant to 49 CFR §573
On April 6, 2023, GM’s Safety Field Action Decision Authority (SFADA) decided to conduct a safety recall. GM’s final analysis of the field data, including legal claims, identified a total of twenty-one potentially related complaints, eleven of which alleged a fire, smoke, or flame. GM was provided notice of those events between July 26, 2021, and January 25, 2023. GM is not aware of any accidents or injuries associated with this condition.
Description of Remedy :
Description of Remedy Program : Dealers will replace the master cylinder pressure sensor. Dealers will also
inspect the associated wire harness and replace if necessary. Pursuant to 577.11, GM will provide reimbursement to owners for repairs according to the plan submitted on May 12, 2021. How Remedy Component Differs from Recalled Component : Identify How/When Recall Condition was Corrected in Production : Replacement pressure sensor assemblies do not incorporate the corrosion inhibitor sealant that was delaminating and causing small fragments of sealer underneath of the diaphragm seal.
On March 21, 2023, Navistar began manufacturing with pressure sensor assemblies that do not incorporate the corrosion inhibitor sealant that was delaminating and causing small fragments of sealer underneath of the diaphragm seal. Recall Schedule :
Description of Recall Schedule : Dealers will be notified on April 13, 2023. GM estimates interim owner
notification will begin on May 29, 2023. GM will provide an estimate for owner notification of an available remedy when an estimate is available.
Planned Dealer Notification Date : APR 13, 2023 – APR 13, 2023
Planned Owner Notification Date : MAY 29, 2023 – MAY 29, 2023
* NR – Not Reported
**************************************************************************************************************
OMB Control No.: 2127-0004
Part 573 Safety Recall Report 23V-266
The information contained in this report was submitted pursuant to 49 CFR §573
Manufacturer Name : Submission Date :
General Motors, LLC APR 13, 2023 NHTSA Recall No. : 23V-266 Manufacturer Recall No. : N222375270 Manufacturer Information :
Manufacturer Name : General Motors, LLC Address : 29427 Louis Chevrolet Road
MAIL CODE 480-210-2V WARREN MI 48093
Company phone : 586-596-1733
Population :
Number of potentially involved : 40,428 Estimated percentage with defect : 1 %
Vehicle Information : Vehicle 1 : 2019-2023 Chevrolet 4500HD/5500HD/6500HD Vehicle Type :
Body Style :
Power Train : NR
Descriptive Information : Manufacturing records were used to identify vehicles built within the affected build window. Vehicles prior to 2019 model year use a different design.
Production Dates : MAY 23, 2018 – APR 05, 2023 VIN Range 1 : Begin : NR End : NR Not sequential
Description of Defect :
Description of the Defect : General Motors has decided that a defect which relates to motor vehicle safety may exist in certain 2019 – 2023 model year Chevrolet Silverado Medium Duty 4500HD/5500HD/6500HD vehicles. These vehicles may have a brake pressure sensor assembly that allows brake fluid to leak beyond the diaphragm seal into the pressure switch. The brake fluid may seep into the sensor’s electrical components and short the brake pressure switch and the associated fuse.
FMVSS 1 : NR FMVSS 2 : NR
Description of the Safety Risk : If brake fluid shorts the brake pressure switch and the associated fuse, the
circuit can generate excessive heat that could result in a fire, increasing the risk of injury. An underhood fire may occur when the vehicle is off and possibly unattended. Description of the Cause : A zinc nickel plating and sealant used to inhibit corrosion within the pressure Part 573 Safety Recall Report 23V-266 Page 2 Identification of Any Warning
that can Occur : sensor assembly may cause delamination of the sealant which results in small fragments of sealer underneath the diaphragm during assembly which allows brake fluid to slowly seep past the seal.
Until the recall remedy is performed, owners are advised to park their vehicles outdoors. This condition may declare with a “service brake system” malfunction indicator lamp. Involved Components : Component Name 1 : SWITCH, BRK PRESS WRNG (W/O TEE CONNECTOR)
Component Description : Brake master cylinder pressure sensor Component Part Number : 19407495 Supplier Identification : Component Manufacturer
Name : Navistar, Inc.
Address : 6125 Urbana Road
Springfield Ohio 45502 Country : United States Chronology :
On August 9, 2022, GM opened a product investigation following a claim of a vehicle fire on a 2019 Chevrolet Silverado Medium Duty vehicle. As part of that investigation, GM coordinated with Navistar, the manufacturer of the subject vehicles, to review field data and warranty returned brake pressure sensors. While a series of tests failed to duplicate the SUFS vehicle’s condition, on January 25, 2023, a warranty returned sensor and harness was identified which exhibited signs of heat damage. This part was subjected to more detailed analysis, including X-ray scans which were completed on February 13, 2023, followed by chemistry laboratory analysis which was completed on February 28, 2023. The results from these analyses revealed the presence of brake fluid past the diaphragm seal, into the brake pressure switch and through the actual wire harness into the pump’s fuse circuit. Analysis of the returned components also revealed delamination of the corrosion inhibiting sealant, which allowed slow seepage of the brake fluid past the diaphragm seal. On March 30, 2023, Navistar reported one potentially related field incident involving a part with alleged heat damage. On April 5, 2023, Navistar provided GM a list of potentially affected vehicle VINs. The information contained in this report was submitted pursuant to 49 CFR §573 Part 573 Safety Recall Report 23V-266
Page 3
The information contained in this report was submitted pursuant to 49 CFR §573
On April 6, 2023, GM’s Safety Field Action Decision Authority (SFADA) decided to conduct a safety recall. GM’s final analysis of the field data, including legal claims, identified a total of twenty-one potentially related complaints, eleven of which alleged a fire, smoke, or flame. GM was provided notice of those events between July 26, 2021, and January 25, 2023. GM is not aware of any accidents or injuries associated with this condition.
Description of Remedy :
Description of Remedy Program : Dealers will replace the master cylinder pressure sensor. Dealers will also
inspect the associated wire harness and replace if necessary. Pursuant to 577.11, GM will provide reimbursement to owners for repairs according to the plan submitted on May 12, 2021. How Remedy Component Differs from Recalled Component : Identify How/When Recall Condition was Corrected in Production : Replacement pressure sensor assemblies do not incorporate the corrosion inhibitor sealant that was delaminating and causing small fragments of sealer underneath of the diaphragm seal.
On March 21, 2023, Navistar began manufacturing with pressure sensor assemblies that do not incorporate the corrosion inhibitor sealant that was delaminating and causing small fragments of sealer underneath of the diaphragm seal. Recall Schedule :
Description of Recall Schedule : Dealers will be notified on April 13, 2023. GM estimates interim owner
notification will begin on May 29, 2023. GM will provide an estimate for owner notification of an available remedy when an estimate is available.
Planned Dealer Notification Date : APR 13, 2023 – APR 13, 2023
Planned Owner Notification Date : MAY 29, 2023 – MAY 29, 2023
* NR – Not Reported
**************************************************************************************************************
OMB Control No.: 2127-0004
Part 573 Safety Recall Report 23V-266
The information contained in this report was submitted pursuant to 49 CFR §573
Manufacturer Name : Submission Date :
General Motors, LLC MAY 17, 2023 NHTSA Recall No. : 23V-266 Manufacturer Recall No. : N222375270 Manufacturer Information :
Manufacturer Name : General Motors, LLC Address : 29427 Louis Chevrolet Road
MAIL CODE 480-210-2V WARREN MI 48093
Company phone : 586-596-1733
Population :
Number of potentially involved : 40,428 Estimated percentage with defect : 1 %
Vehicle Information : Vehicle 1 : 2019-2023 Chevrolet 4500HD/5500HD/6500HD Vehicle Type :
Body Style :
Power Train : NR
Descriptive Information : Manufacturing records were used to identify vehicles built within the affected build window. Vehicles prior to 2019 model year use a different design.
Production Dates : MAY 23, 2018 – APR 05, 2023 VIN Range 1 : Begin : NR End : NR Not sequential
Description of Defect :
Description of the Defect : General Motors has decided that a defect which relates to motor vehicle safety may exist in certain 2019 – 2023 model year Chevrolet Silverado Medium Duty 4500HD/5500HD/6500HD vehicles. These vehicles may have a brake pressure sensor assembly that allows brake fluid to leak beyond the diaphragm seal into the pressure switch. The brake fluid may seep into the sensor’s electrical components and short the brake pressure switch and the associated fuse.
FMVSS 1 : NR FMVSS 2 : NR
Description of the Safety Risk : If brake fluid shorts the brake pressure switch and the associated fuse, the
circuit can generate excessive heat that could result in a fire, increasing the risk of injury. An underhood fire may occur when the vehicle is off and possibly unattended. Description of the Cause : A zinc nickel plating and sealant used to inhibit corrosion within the pressure Part 573 Safety Recall Report 23V-266 Page 2 Identification of Any Warning
that can Occur : sensor assembly may cause delamination of the sealant which results in small fragments of sealer underneath the diaphragm during assembly which allows brake fluid to slowly seep past the seal.
Until the recall remedy is performed, owners are advised to park their vehicles outdoors. This condition may declare with a “service brake system” malfunction indicator lamp. Involved Components : Component Name 1 : SWITCH, BRK PRESS WRNG (W/O TEE CONNECTOR)
Component Description : Brake master cylinder pressure sensor Component Part Number : 19407495 Supplier Identification : Component Manufacturer
Name : Navistar, Inc.
Address : 2701 Navistar Dr.
Lisle Illinois 60532 Country : United States Chronology :
On August 9, 2022, GM opened a product investigation following a claim of a vehicle fire on a 2019 Chevrolet Silverado Medium Duty vehicle. As part of that investigation, GM coordinated with Navistar, the manufacturer of the subject vehicles, to review field data and warranty returned brake pressure sensors. While a series of tests failed to duplicate the SUFS vehicle’s condition, on January 25, 2023, a warranty returned sensor and harness was identified which exhibited signs of heat damage. This part was subjected to more detailed analysis, including X-ray scans which were completed on February 13, 2023, followed by chemistry laboratory analysis which was completed on February 28, 2023. The results from these analyses revealed the presence of brake fluid past the diaphragm seal, into the brake pressure switch and through the actual wire harness into the pump’s fuse circuit. Analysis of the returned components also revealed delamination of the corrosion inhibiting sealant, which allowed slow seepage of the brake fluid past the diaphragm seal. On March 30, 2023, Navistar reported one potentially related field incident involving a part with alleged heat damage. On April 5, 2023, Navistar provided GM a list of potentially affected vehicle VINs. The information contained in this report was submitted pursuant to 49 CFR §573 Part 573 Safety Recall Report 23V-266
Page 3
The information contained in this report was submitted pursuant to 49 CFR §573
On April 6, 2023, GM’s Safety Field Action Decision Authority (SFADA) decided to conduct a safety recall. GM’s final analysis of the field data, including legal claims, identified a total of twenty-one potentially related complaints, eleven of which alleged a fire, smoke, or flame. GM was provided notice of those events between July 26, 2021, and January 25, 2023. GM is not aware of any accidents or injuries associated with this condition.
Description of Remedy :
Description of Remedy Program : Dealers will replace the master cylinder pressure sensor. Dealers will also
inspect the associated wire harness and replace if necessary. Pursuant to 577.11, GM will provide reimbursement to owners for repairs according to the plan submitted on May 12, 2021. How Remedy Component Differs from Recalled Component : Identify How/When Recall Condition was Corrected in Production : Replacement pressure sensor assemblies do not incorporate the corrosion inhibitor sealant that was delaminating and causing small fragments of sealer underneath of the diaphragm seal.
On March 21, 2023, Navistar began manufacturing with pressure sensor assemblies that do not incorporate the corrosion inhibitor sealant that was delaminating and causing small fragments of sealer underneath of the diaphragm seal. Recall Schedule :
Description of Recall Schedule : Dealers will be notified on April 13, 2023. Interim owner notification was
mailed on May 10, 2023. GM estimates owner notification of an available remedy will begin June 30, 2023.
Planned Dealer Notification Date : APR 13, 2023 – APR 13, 2023
Planned Owner Notification Date : JUN 30, 2023 – JUN 30, 2023
* NR – Not Reported
**************************************************************************************************************
OMB Control No.: 2127-0004
Part 573 Safety Recall Report 23V-266
The information contained in this report was submitted pursuant to 49 CFR §573
Manufacturer Name : Submission Date :
General Motors, LLC MAY 17, 2023 NHTSA Recall No. : 23V-266 Manufacturer Recall No. : N222375270 Manufacturer Information :
Manufacturer Name : General Motors, LLC Address : 29427 Louis Chevrolet Road
MAIL CODE 480-210-2V WARREN MI 48093
Company phone : 586-596-1733
Population :
Number of potentially involved : 40,428 Estimated percentage with defect : 1 %
Vehicle Information : Vehicle 1 : 2019-2023 Chevrolet 4500HD/5500HD/6500HD Vehicle Type :
Body Style :
Power Train : NR
Descriptive Information : Manufacturing records were used to identify vehicles built within the affected build window. Vehicles prior to 2019 model year use a different design.
Production Dates : MAY 23, 2018 – APR 05, 2023 VIN Range 1 : Begin : NR End : NR Not sequential
Description of Defect :
Description of the Defect : General Motors has decided that a defect which relates to motor vehicle safety may exist in certain 2019 – 2023 model year Chevrolet Silverado Medium Duty 4500HD/5500HD/6500HD vehicles. These vehicles may have a brake pressure sensor assembly that allows brake fluid to leak beyond the diaphragm seal into the pressure switch. The brake fluid may seep into the sensor’s electrical components and short the brake pressure switch and the associated fuse.
FMVSS 1 : NR FMVSS 2 : NR
Description of the Safety Risk : If brake fluid shorts the brake pressure switch and the associated fuse, the
circuit can generate excessive heat that could result in a fire, increasing the risk of injury. An underhood fire may occur when the vehicle is off and possibly unattended. Description of the Cause : A zinc nickel plating and sealant used to inhibit corrosion within the pressure Part 573 Safety Recall Report 23V-266 Page 2 Identification of Any Warning
that can Occur : sensor assembly may cause delamination of the sealant which results in small fragments of sealer underneath the diaphragm during assembly which allows brake fluid to slowly seep past the seal.
Until the recall remedy is performed, owners are advised to park their vehicles outdoors. This condition may declare with a “service brake system” malfunction indicator lamp. Involved Components : Component Name 1 : SWITCH, BRK PRESS WRNG (W/O TEE CONNECTOR)
Component Description : Brake master cylinder pressure sensor Component Part Number : 19407495 Supplier Identification : Component Manufacturer
Name : Navistar, Inc.
Address : 2701 Navistar Dr.
Lisle Illinois 60532 Country : United States Chronology :
On August 9, 2022, GM opened a product investigation following a claim of a vehicle fire on a 2019 Chevrolet Silverado Medium Duty vehicle. As part of that investigation, GM coordinated with Navistar, the manufacturer of the subject vehicles, to review field data and warranty returned brake pressure sensors. While a series of tests failed to duplicate the SUFS vehicle’s condition, on January 25, 2023, a warranty returned sensor and harness was identified which exhibited signs of heat damage. This part was subjected to more detailed analysis, including X-ray scans which were completed on February 13, 2023, followed by chemistry laboratory analysis which was completed on February 28, 2023. The results from these analyses revealed the presence of brake fluid past the diaphragm seal, into the brake pressure switch and through the actual wire harness into the pump’s fuse circuit. Analysis of the returned components also revealed delamination of the corrosion inhibiting sealant, which allowed slow seepage of the brake fluid past the diaphragm seal. On March 30, 2023, Navistar reported one potentially related field incident involving a part with alleged heat damage. On April 5, 2023, Navistar provided GM a list of potentially affected vehicle VINs. The information contained in this report was submitted pursuant to 49 CFR §573 Part 573 Safety Recall Report 23V-266
Page 3
The information contained in this report was submitted pursuant to 49 CFR §573
On April 6, 2023, GM’s Safety Field Action Decision Authority (SFADA) decided to conduct a safety recall. GM’s final analysis of the field data, including legal claims, identified a total of twenty-one potentially related complaints, eleven of which alleged a fire, smoke, or flame. GM was provided notice of those events between July 26, 2021, and January 25, 2023. GM is not aware of any accidents or injuries associated with this condition.
Description of Remedy :
Description of Remedy Program : Dealers will replace the master cylinder pressure sensor. Dealers will also
inspect the associated wire harness and replace if necessary. Pursuant to 577.11, GM will provide reimbursement to owners for repairs according to the plan submitted on May 12, 2021. How Remedy Component Differs from Recalled Component : Identify How/When Recall Condition was Corrected in Production : Replacement pressure sensor assemblies do not incorporate the corrosion inhibitor sealant that was delaminating and causing small fragments of sealer underneath of the diaphragm seal.
On March 21, 2023, Navistar began manufacturing with pressure sensor assemblies that do not incorporate the corrosion inhibitor sealant that was delaminating and causing small fragments of sealer underneath of the diaphragm seal. Recall Schedule :
Description of Recall Schedule : Dealers will be notified on April 13, 2023. Interim owner notification was
mailed on May 10, 2023. GM estimates owner notification of an available remedy will begin June 30, 2023.
Planned Dealer Notification Date : APR 13, 2023 – APR 13, 2023
Planned Owner Notification Date : JUN 30, 2023 – JUN 30, 2023
* NR – Not Reported
SEOCONTENT-END
This product presentation was made with AAWP plugin.